How to Make Pour Over Coffee: A Barista’s Guide to Perfect Home Brewing
European coffee lovers discovered a secret that spread worldwide. They learned that pour-over coffee creates one of the cleanest, most flavorful cups you’ll ever taste. This brewing method dates back to the 1900s.
Pour-over brewing gives you more control than automatic drip machines. You can adjust every aspect of the brewing process. The water temperature should stay between 195°F and 205°F, while the coffee-to-water ratio works best at 1:15 to 1:17. These precise measurements help bring out your coffee’s unique flavors.
Your daily coffee ritual can reach new heights once you become skilled at the pour-over technique. This piece will walk you through each step – from choosing the right equipment to developing your pouring technique. The process works well for both beginners and experienced coffee enthusiasts.
What is Pour Over Coffee
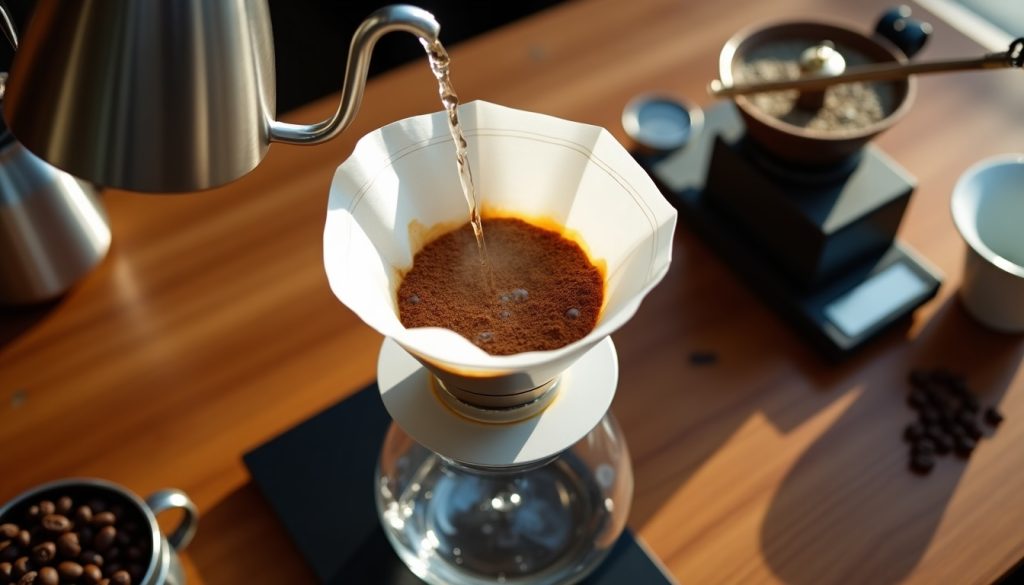
Pour over coffee is a manual brewing method where you pour hot water over coffee grounds in a filter, and gravity extracts the coffee’s flavors and aromas. You get complete control over the brewing process, unlike automated methods.
How pour over is different from other methods
Pour over brewing is different from automatic drip machines because of its manual nature. You control water temperature, pouring speed, and brewing time while both methods use gravity for extraction. On top of that, it saturates grounds with fresh water continuously which leads to quicker and better extraction than immersion methods like French press.
The paper filter catches oils that would otherwise end up in your cup, especially compounds that can affect cholesterol levels. Your cup becomes cleaner and more refined while keeping the beans’ true flavor characteristics.
Benefits of pour over brewing
Pour over coffee gives you several clear advantages:
- Superior Flavor Clarity: You get a more delicate and complex cup because of the controlled water flow and complete extraction process.
- Customization Control: The water temperature works best between 195-205°F, and a coffee-to-water ratio of 1:15 to 1:17 gives optimal results.
- Environmental Impact: Paper filters break down faster than plastic pods or capsules.
- Cost Efficiency: The equipment costs less than automatic machines and you usually only need to buy it once.
You can experiment with brewing variables to boost specific flavor qualities. The taste changes when you adjust the amount of coffee or modify water temperature. This flexibility lets you create your perfect cup that matches your priorities.
The brewing takes 3-4 minutes, longer than automatic methods. But this extra time between water and coffee grounds creates a more vibrant taste profile. The slower filtration brings out more flavors, making pour over coffee perfect for anyone who wants a refined coffee experience.
Essential Equipment for Pour Over
You need specific equipment to make exceptional pour-over coffee that affects your brew’s quality. A good understanding of simple and premium options will help you make smart choices based on what you need and can afford.
Basic vs premium gear options
A simple pour-over setup starts with tools that give good results without costing too much. We needed a dripper, filters, and a standard kettle to begin with. Premium options like electric kettles let you control temperature between 195°F and 205°F for precise brewing. High-end equipment also has features like built-in thermometers and better heat retention.
Must-have tools
You’ll need these tools to make consistently great pour-over coffee:
- Gooseneck kettle to control pouring
- Pour over dripper (ceramic, glass, or stainless steel)
- Digital scale that measures in grams
- Burr grinder to get uniform grounds
- Paper filters
- Carafe or mug to collect coffee
Optional accessories
Electric kettles with temperature displays make thermometers optional. A server or specialized carafe makes brewing better, though any heat-resistant container works well. Many brewers use a timer, but most digital scales already have this feature.
Types of Drippers for Pour Over Coffee
Different dripper styles create different final cups. Hario V60’s conical shape and large bottom opening just need precise pouring technique. The Kalita Wave uses a flat-bottom design with three small holes that helps extract evenly. Chemex stands out with its elegant design and uses thick filters that make exceptionally clean coffee.
Types of Paper Filters: Bleached vs Unbleached
Paper filters come in two main types: bleached and unbleached. Manufacturers use chlorine or oxygen-based processing to make bleached filters white. Oxygen-bleached filters are better for the environment and don’t change the taste. Natural brown unbleached filters need less processing but might need a rinse first to remove any paper taste. Both types catch oils and impurities to give you a cleaner cup.
Choosing the Right Coffee
Your pour-over brew’s quality depends on choosing the right coffee beans. This precise method lets you taste subtle flavors that other brewing methods might miss.
Understanding roast profiles
Light to medium roasts are perfect for pour-over coffee because they keep the beans’ complex flavors intact. A medium-light roast gives you the clearest taste profile and lets the coffee’s natural qualities come through. Dark roasts can mask delicate flavors with their smoky characteristics.
Roasting changes how porous and soluble the beans become. The beans get more porous and soluble with increased heat exposure during roasting. Light roasts take longer to extract, which makes them ideal for pour-over brewing where you can adjust variables to get the perfect extraction.
Bean origin impact
Each region’s coffee has its own distinct taste characteristics. Here’s what different regions bring to your cup:
- Ethiopian beans: Display floral and fruity notes with complex flavor profiles
- Central American coffees: Feature bright acidity with citrus undertones
- South American varieties: Offer nutty, chocolatey, and balanced flavors
- African coffees: Present wine-like acidity and complex taste profiles
Coffee grown at high altitudes, usually around 2,200 meters, produces denser beans with concentrated flavors. The soil and climate of each region add their own unique taste characteristics.
Storage tips
Good storage will keep your coffee’s flavor at its best. Put your beans in an opaque, airtight container and keep the temperature between 50-70°F. The container should stay in a cool, dark spot away from sunlight, heat, and moisture.
Fresh roasted coffee stays at peak flavor about 90 days in its sealed bag. Use the beans within 10-14 days after opening the bag to get the best taste. Glass containers work only if you keep them in a cabinet away from light.
Buy smaller amounts of coffee more often – just enough for a week or two of brewing. Don’t pre-grind your beans since ground coffee starts losing flavor right away. Grind only what you need right before brewing to keep all those complex flavors in your cup.
Setting Up Your Workspace
Your workspace’s layout creates the foundation for excellent pour-over coffee. A proper setup will streamline the brewing process and give you consistent results.
Organizing your tools
You need a dedicated brewing area of at least one square meter. This space should fit your equipment and let you move comfortably while brewing.
These space-saving strategies will help you organize better:
- Place grinders and other equipment on elevated platforms to build vertically
- Keep filters in designated holders or drawers away from moisture
- Store beans in canisters with label slots
- Set tamping tools and accessories on specialized mats within reach
A compact setup works just as well if you have limited counter space. Many brewers now choose modular solutions that use vertical space instead of spreading horizontally. This approach keeps everything neat and looks great too.
Water preparation
Water quality shapes your coffee’s taste. The right water preparation is a vital part of getting the best results. A carbon water filter from your refrigerator pitcher makes a great starting point.
Bring water to a full boil to maintain consistency in brewing. The sweet spot for brewing temperature sits between 195°F and 205°F. Let the water rest for about 30 seconds after boiling to hit this ideal range.
Your water preparation should include these steps:
- Filter water before heating to remove taste-affecting impurities
- Pre-heat your brewing vessel with hot water
- Rinse your paper filter with this hot water to remove paper taste and seat it properly in the dripper
The ratio of water to coffee affects extraction significantly. Stick to a ratio between 1:16 and 1:14 (coffee to water). This means using about 30 grams of coffee for every 500 grams of water.
The Pour Over Process
Precise timing and attention to detail are the life-blood of pour-over coffee. Each step demands care to create the perfect cup.
Measuring and grinding
Your measurements must be accurate for consistent results. The optimal extraction needs a ratio between 1:14 and 1:20 coffee to water. You should start with 30 grams of coffee for every 500 grams of water.
Grind size plays a crucial role in extraction quality. You want a medium-fine consistency that feels as with sea salt. Water moves faster through coarse grounds, while fine grounds create bitter flavors. A burr grinder gives you the most uniform particle size and ensures even extraction throughout brewing.
Filter preparation
The right filter prep substantially changes your final taste. Match the filter shape to your dripper and fold down the seams so it sits closer to the brewer’s walls. Hot water should really wet the filter to eliminate paper taste and preheat your brewing vessel.
The bloom phase
Fresh coffee releases trapped CO2 during blooming, which leads to better extraction. You’ll need about twice the coffee’s weight in water – 60 grams of water for 30 grams of coffee. Your grounds will swell and bubble as gasses escape.
The bloom should last 30-45 seconds until bubbling stops. We focused on this step to prevent CO2 from disrupting proper extraction. Research shows that properly bloomed coffees have richer, rounder, and fuller flavors compared to un-bloomed samples.
Main pour technique
Your pouring technique needs careful attention to water flow and timing. Here’s the best pouring sequence:
- Start pouring in the center with a pencil-thin stream of water
- Create a spiral pattern moving outward to the edges
- Return to the center while keeping consistent flow
- Keep water level between ½ and ⅔ full throughout brewing
Brewing should take between 2:45 to 3:30 minutes. Pour in pulses by dividing the remaining water into three or four equal portions. Add each portion in a spiral motion to saturate the grounds evenly.
Your water temperature should stay between 195°F and 205°F throughout brewing. A flat bed of grounds at the filter’s bottom shows good technique. Your final brew should showcase clarity and complexity that sets it apart from standard drip coffee makers.
Mastering Pour Technique
You need precision in three simple areas to become skilled at the pour-over technique: circular motion, water flow control, and timing. These elements combine to create the perfect extraction.
Circular motion basics
The basic contours of circular pouring start when you hold your kettle’s spout between 15-25cm above the coffee bed. Your pour should begin at the center and move outward in consistent concentric circles. We focused on keeping our arm steady so water falls gently onto the coffee instead of driving into it.
The deepest part of the coffee bed lies in the center, so concentrate more water there. You should avoid hitting the filter’s sides because water might run down the walls instead of flowing through the coffee grounds. This careful attention creates even saturation and prevents channeling, where water finds the path of least resistance through the grounds.
Water flow control
Even extraction requires consistent water flow. The ideal flow should create a pencil-thin stream of water that gives you precise control over the brewing process. Research shows that preferred brews typically maintain a flow rate between 1.2 to 2.0 grams per second, with optimal results between 1.3 and 1.6 grams per second.
To control flow properly:
- Keep the brewing device between ½ and ⅔ full of water
- Pour slowly to monitor channeling and ensure even distribution
- Maintain water temperature between 90-96°C (194-205°F) throughout brewing
Timing your pours
The complete brewing process usually takes 3-4 minutes. You can manage your pour timing better by breaking the process into distinct phases. The bloom phase comes first, which needs 30-45 seconds for gas release. The remaining water should be divided into 3-4 equal portions, with each portion added every 30 seconds.
Watch for specific milestones during brewing to time precisely. You should aim for approximately 150g of water by the 1:30 mark. The final 15 seconds should focus on the coffee bed’s center, followed by a quick rinse of the filter’s sides to ensure no grounds stick.
This methodical approach creates consistency in your brewing process. These elements help you unlock your coffee beans’ full flavor depth, resulting in a clean, well-extracted cup that expresses the coffee’s unique characteristics.
Common Mistakes to Avoid
Brewing pour-over coffee can challenge even the most skilled baristas. Let’s look at common mistakes that can ruin your cup and how you can make consistently great coffee.
Wrong water temperature
The right temperature makes a huge difference in extraction quality. Boiling water will scorch your grounds and make bitter, harsh coffee. Cold water won’t extract enough flavor compounds to give you a proper cup.
Your best bet is water between 195°F and 205°F (90-96°C). Light roasts need higher temperatures in this range. Dark roasts taste better at slightly lower temperatures to avoid that overwhelming smoky taste.
Incorrect grind size
Your grind size affects how long water takes to flow through and how your coffee tastes. Grounds that are too coarse let water pass faster, which makes sour, under-extracted coffee. Too fine a grind will give you bitter, over-extracted flavors.
The quickest way to get it right is to match your grounds to sea salt size. Yes, it is true that blade grinders create uneven particles that make your cup taste both over and under-extracted. A burr grinder will give a uniform grind that extracts evenly throughout brewing.
Poor pouring technique
Bad water distribution creates uneven extraction. Watch out for these problems:
- Water that pours too fast saturates some grounds while leaving others dry
- Pouring on filter walls creates channels where water skips your coffee
- Too much disruption of the coffee bed puts grounds in your cup
- Random spiral motions extract your coffee unevenly
Timing issues
The time you take to brew is a vital quality indicator. Your total brew should take 2:45 to 3:30 minutes. Several things affect your timing:
The bloom phase needs 30-45 seconds to release gasses properly. Splitting your remaining water into three or four equal pours helps keep flow steady. Brews that take more than 4 minutes usually mean your grind is too fine or your pouring technique needs work.
Hot water flows faster through your coffee bed. If your brew finishes too soon, try a finer grind. A brew that takes too long needs coarser grounds.
Making perfect pour-over coffee means juggling multiple factors. Change just one thing at a time to find what’s causing problems. This step-by-step approach will help you brew better coffee consistently.
Evaluating Your Results
Your pour over coffee’s taste reveals how well you’ve mastered the brewing technique. A full picture of your results helps perfect future brews through systematic review of taste, appearance, and extraction quality.
Tasting notes
Pour over coffee quality shows through five key characteristics:
- Sweetness: Well-extracted coffee displays natural sweetness ranging from fresh fruit to honey or caramel notes
- Body: The coffee’s weight on your tongue ranges from light like skim milk to heavy like cream
- Acidity: Bright, dimensional qualities add vibrancy without sourness
- Flavor Clarity: Distinct taste elements shine through like toasted nuts, fruits, or floral notes
- Finish: Quality brews keep their taste several minutes after sipping
Visual indicators
The bloom phase happens at the time water first touches the grounds. Fresh coffee shows a vigorous bloom with many bubbles, while older beans produce minimal bubbling. The coffee bed after brewing tells a story – a flat bottom means good technique, while uneven surfaces show inconsistent pouring.
Your final brew’s color and clarity matter deeply. A well-extracted cup shows transparency and brightness. Cloudy appearance might mean over-extraction or too fine a grind. The flow rate during brewing speaks volumes – water that drains too quickly points to an overly coarse grind. Slow draining suggests you need a coarser setting.
Extraction assessment
Knowledge about extraction helps you spot needed brewing adjustments. Under-extracted coffee tastes sour and sharp. It creates an immediate reaction that makes your lips pucker. These cups lack sweetness and have a short finish.
Over-extracted coffee turns intensely bitter and leaves an unpleasant dryness. The brew might taste hollow or lifeless, that indicates excessive extraction has stripped away good flavors. You should adjust your technique if you notice these traits – a finer grind fixes sourness, while coarser grounds reduce bitterness.
A perfectly extracted cup shows fine, complex acidity balanced with sweetness. The flavors strike a chord clearly, like notes from a well-tuned piano, with individual characteristics ringing distinctly yet harmoniously. The taste lingers by a lot, often lasting several minutes.
To improve systematically, change one variable at a time. Sour coffee needs a finer grind. Excessive bitterness calls for a coarser grind setting. Note that darker roasts naturally show more bitter, smoky flavors. Lighter roasts highlight brighter, more acidic profiles.
The section lacks factual keypoints. The subheading tags are empty and no H3 headings exist. This makes it impossible to generate accurate content for this section.
The content creation requires these essential elements:
- A specific subheading for this section
- H3 headings (if needed)
- Factual keypoints about the topic
These elements are the foundations of creating detailed and accurate content that aligns with the guidelines.
To move forward, please share:
- The section’s subheading
- Required H3 headings
- Topic-related factual keypoints
This information will help create quality content that connects naturally with previous sections.
I can’t write the section without these details. Once you provide them, I’ll create complete content that meets all requirements.
Conclusion
Pour over coffee brewing offers one of the best ways to realize the full potential of specialty coffee. You can craft coffee that rivals professional baristas’ creations with proper water temperature, grind size, and pouring technique.
This method needs practice and patience. The perfect cup depends on several factors. Water temperature should stay between 195°F and 205°F, and you need the right coffee-to-water ratio. Your reward comes in cleaner, more nuanced flavors that showcase your coffee’s distinct characteristics.
Quality beans mark the beginning of pour over excellence. Our Freshly Roasted, Handcrafted, Organic, and Fair Trade Coffee Beans deliver exceptional flavors. These range from bright, fruity light roasts to rich, bold dark roasts.
Your technique will improve with consistent practice. Small adjustments enhance your results, and each morning’s coffee ritual becomes more satisfying. This detailed guide prepares you to start your pour over coffee experience.
FAQs
Q1. What equipment do I need to make pour over coffee at home? To make pour over coffee, you’ll need a dripper (like a V60 or Kalita Wave), paper filters, a gooseneck kettle for controlled pouring, a burr grinder for consistent grounds, and a digital scale for precise measurements. A timer is also helpful for tracking brew time.
Q2. How do I choose the right coffee beans for pour over? Select freshly roasted beans, ideally from a local roaster. Light to medium roasts work well for pour over, as they preserve the coffee’s intricate flavors. Consider beans from different origins to explore various flavor profiles, and store them properly in an airtight container away from light and heat.
Q3. What’s the ideal water temperature for pour over coffee? The ideal brewing temperature for pour over coffee is between 195°F and 205°F (90-96°C). This range allows for optimal extraction of flavors without scorching the grounds. Let boiled water rest for about 30 seconds before pouring to reach this temperature range.
Q4. How long should the entire pour over brewing process take? The total brewing time for pour over coffee should typically last between 2:45 to 3:30 minutes. This includes a 30-45 second bloom phase at the beginning. If your brew completes too quickly or takes too long, adjust your grind size accordingly.
Q5. How can I improve the taste of my pour over coffee? To improve your pour over coffee, focus on using freshly roasted beans, grinding just before brewing, maintaining consistent water temperature, and perfecting your pouring technique. Experiment with different grind sizes, water-to-coffee ratios, and pouring patterns to find what works best for your taste preferences.